
परिचय
The Melnor 3060 Digital Water Timer Plus is designed to automate your watering schedule, providing convenience and efficient water management for your lawn or garden. This timer allows you to set precise watering times and durations, ensuring your plants receive the right amount of water without constant manual intervention. It features an easy-to-read LCD menu for programming and supports multiple independent watering cycles.
This manual provides detailed instructions for setting up, operating, and maintaining your Melnor 3060 Digital Water Timer Plus. Please read it thoroughly before use to ensure optimal performance and longevity of your device.
प्रमुख विशेषताऐं
- Automated Watering: Set and forget, program to automatically start and shut off.
- आसान प्रोग्रामिंग: Features an intuitive LCD menu for straightforward setup.
- बहुमुखी संगतता: Works effectively with low-pressure drip systems and soaker hoses.
- लचीली समय-सारणी: Program up to 6 independently programmable cycles, allowing watering while away or at night.
- मैनुअल ऑपरेशन: Includes an on/off function to use like a standard faucet.
- Additional Outlet: Equipped with a second manual outlet for convenient watering.
सुरक्षा संबंधी जानकारी
चेतावनी: यह उत्पाद आपको स्टाइरीन सहित रसायनों के संपर्क में ला सकता है, जिसे कैलिफोर्निया राज्य में कैंसर का कारण माना जाता है। अधिक जानकारी के लिए, पर जाएँ www.P65Warnings.ca.gov.
For outdoor use only. Do not use this timer indoors or for purposes other than watering.
स्थापित करना
1. बैटरी स्थापित करें
The Melnor 3060 Digital Water Timer Plus requires two (2) AA batteries (not included) for operation. Ensure batteries are inserted with correct polarity.
- टाइमर के पीछे की तरफ बैटरी कंपार्टमेंट का पता लगाएं।
- बैटरी कम्पार्टमेंट कवर खोलें.
- Insert two fresh AA alkaline batteries, matching the (+) and (-) terminals correctly.
- Securely close the battery compartment cover to prevent water intrusion.
2. Attach to Faucet
Connect the timer to a standard outdoor hose faucet.
- नल बंद करना सुनिश्चित करें।
- Thread the timer's inlet connector onto the faucet. Hand-tighten only to prevent damage.
- Attach your garden hose or watering system to the timer's outlet.
- Slowly turn on the faucet completely. The timer is designed to operate with full water pressure.
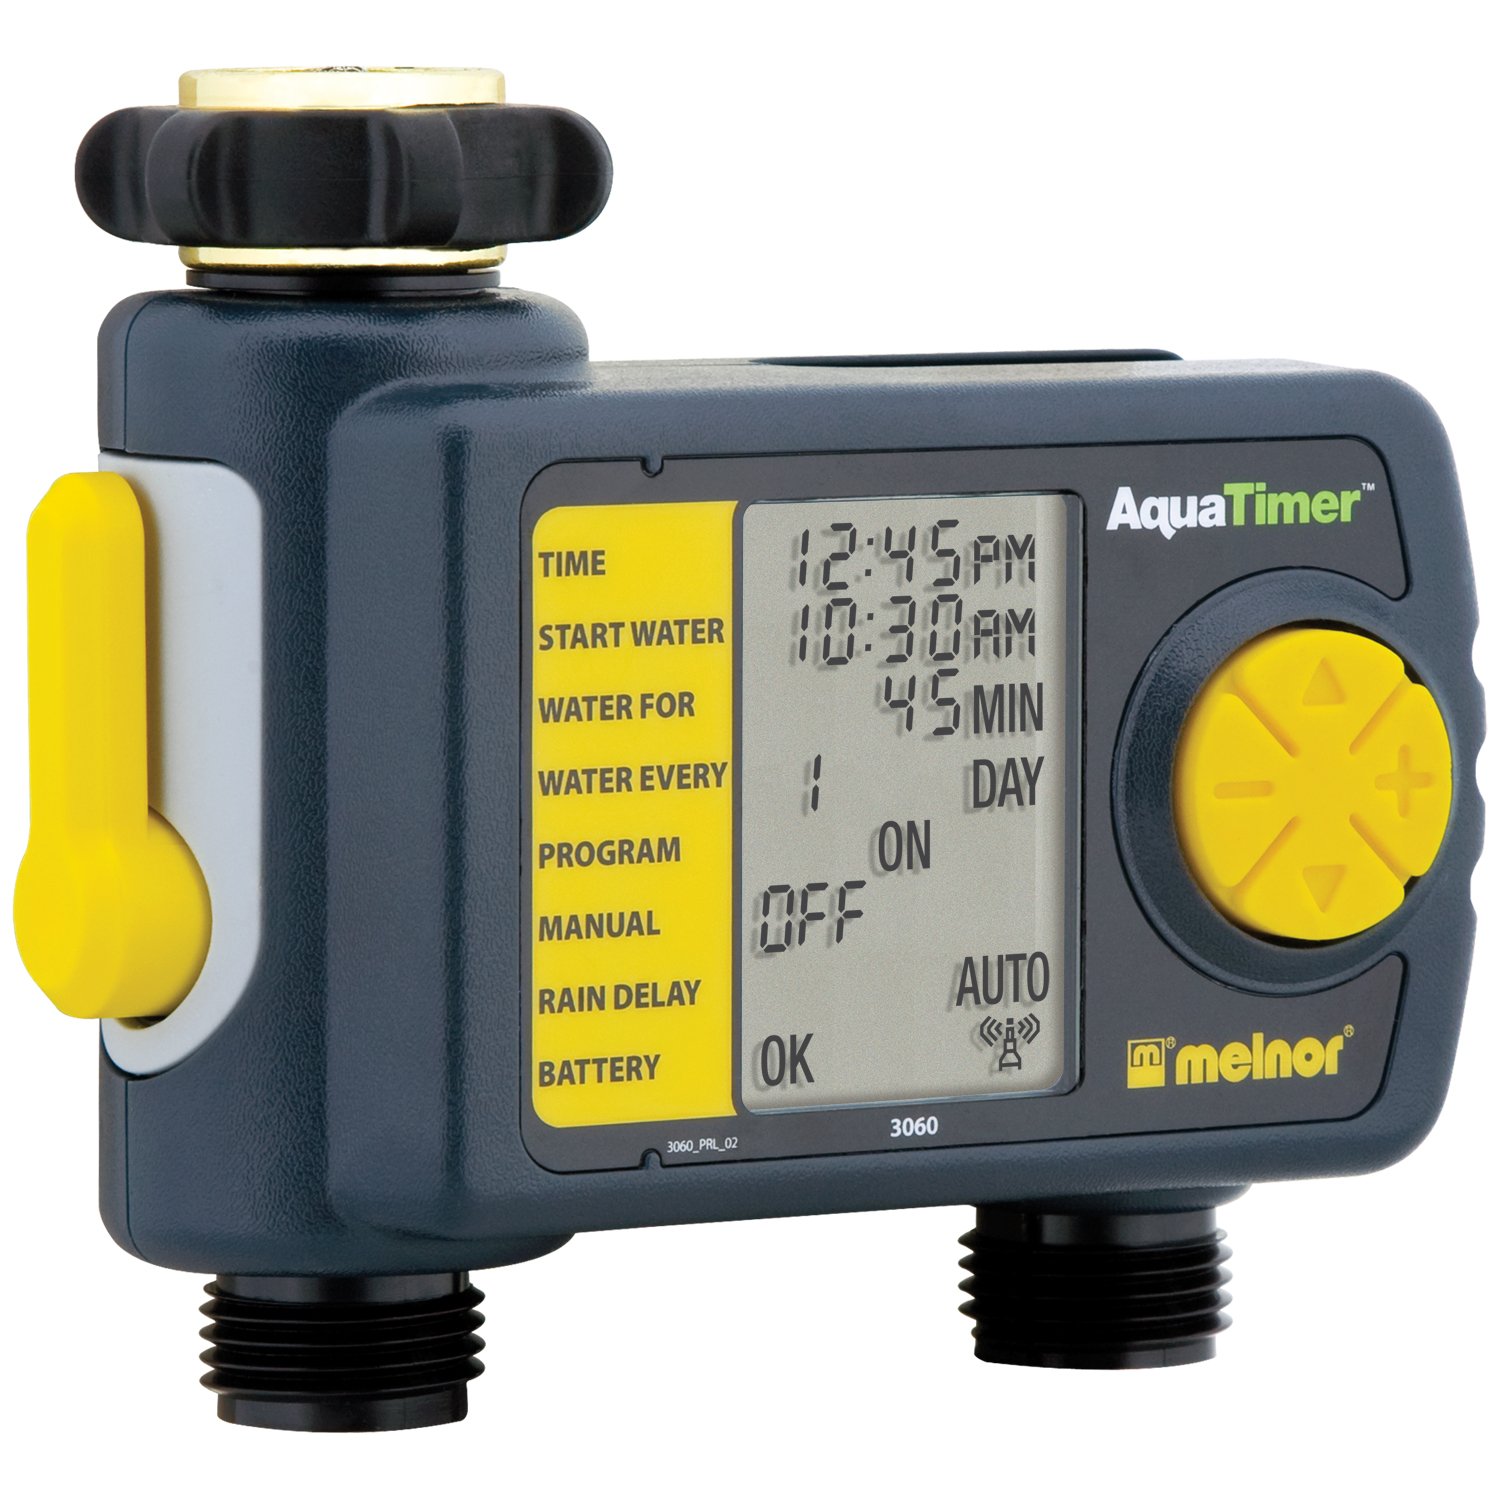
Image: The Melnor 3060 Digital Water Timer Plus, showing its connection points for a faucet and a garden hose.
ऑपरेटिंग निर्देश
The Melnor 3060 features an LCD display and several buttons for programming. Refer to the on-screen prompts for guidance.
1. Set Current Time
- दबाओ घड़ी ठीक करें बटन।
- उपयोग + और - घंटे और मिनट को समायोजित करने के लिए बटन।
- प्रेस OK or घड़ी ठीक करें फिर से पुष्टि करने के लिए.
2. Program Watering Schedule
The timer allows for up to six independent watering cycles per day. You can also choose from five preset programs.
- दबाओ कार्यक्रम प्रोग्रामिंग मोड में प्रवेश करने के लिए बटन.
- उपयोग + और - buttons to select a program number (1-6) or a preset option.
- प्रेस OK अपने चयन की पुष्टि करने के लिए.
- Follow the on-screen prompts to set the:
- समय शुरू: When watering begins.
- अवधि: How long watering will last.
- आवृत्ति: How often watering occurs (e.g., every day, every other day, specific days of the week).
- Repeat for additional watering cycles as needed.
- Once all programs are set, ensure the timer is in ऑटो mode for automatic operation.
3. मैनुअल सिंचाई
अपने निर्धारित शेड्यूल को प्रभावित किए बिना मैन्युअल रूप से पानी देने के लिए:
- दबाओ बंद बटन।
- The water will begin to flow.
- To stop manual watering, press the बंद button again. The timer will return to its programmed schedule.
4. Using the Second Manual Outlet
The timer includes a second, un-timed manual outlet. This outlet functions like a standard faucet and is not controlled by the timer's programming. Simply attach a hose and open the valve on the timer to use it.
रखरखाव
- बैटरी प्रतिस्थापन: Replace batteries annually or when the low battery indicator appears on the LCD. Always use fresh AA alkaline batteries.
- शीतकालीनकरण: To prevent damage from freezing, remove the timer from the faucet before the first frost. Store it indoors in a dry, protected area.
- सफाई: Periodically check the inlet screen for debris and clean if necessary to maintain proper water flow.
समस्या निवारण
| संकट | संभावित कारण | समाधान |
|---|---|---|
| टाइमर पानी नहीं दे रहा है। |
|
|
| कनेक्शनों से पानी रिस रहा है। |
|
|
| डिस्प्ले खाली या धुंधला है. |
|
|
विशेष विवरण
- मॉडल संख्या: 3060 (also referred to as 3100 in some documentation)
- शक्ति का स्रोत: 2 x AA एल्कलाइन बैटरियाँ (शामिल नहीं)
- उत्पाद आयाम: 4.5 x 5.2 x 4.5 इंच
- आइटम का वजन: 12.8 औंस
- निर्माता: मेलनोर
- Watering Cycles: Up to 6 independently programmable cycles
- पूर्व निर्धारित कार्यक्रम: 5
वारंटी जानकारी
The Melnor 3060 Digital Water Timer Plus comes with a दो साल की सीमित वारंटी. This warranty covers defects in materials and workmanship under normal use. For specific terms and conditions, or to make a warranty claim, please refer to the warranty card included with your product or contact Melnor customer service.
ग्राहक सहेयता
If you have any questions, require assistance with setup or programming, or encounter any issues not covered in this manual, please contact Melnor Customer Service. Contact information can typically be found on the product packaging or on the official Melnor webसाइट।